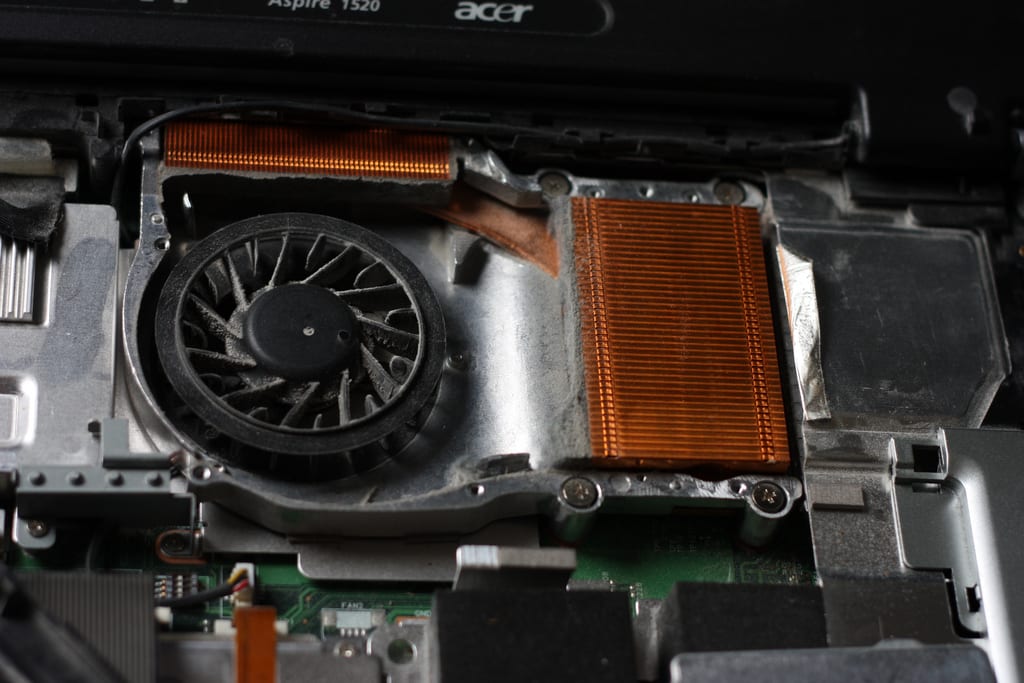
TWO WAYS TO CLEAN YOUR LAPTOP FAN
Learn how to clean your laptop fan with Elistatus. A lot of laptops use fans to cool components that would otherwise overheat. Necessarily a laptop will have one or two fans cooling the central processor and graphics chip.
When it comes to the designs, many use a heat pipe system to remove heat from these parts with a single fan cooling a heatsink, which is attached to the heat-pipes. The heatsink will have lots of fins to dissipate the heat, and dust can also build up between these fins, reducing cooling efficiency enormously.
With everything packed tightly to make the laptop as slim as possible, there’s very little room for airflow. The less flow of air means that even small amounts of dirt and dust can affect the cooling system’s effectiveness.
If you notice that your laptop’s fan is running more noisily or more often than usual or you see it won’t go off at all, The most important place to check is Windows’ Task Manager (Ctrl-Shift-Esc). The Processes tab, you’ll see how much of your laptop’s resources each app is using, but you may have to click on ‘More details’ to see the proper stats.
Check your laptop for any application that makes use of a high percentage of the CPU time. Doing this will help you determine the underlying problem that causes the fan to run at top speed.
When you find that there is nothing unusual, you can attempt to clean the fan and heatsinks.
Many modern laptops are not designed to be opened up by users, and fans can be located deep inside.
Other laptops have ‘service’ panels underneath that require only a screwdriver to remove, but getting to the fan is the best way to clean it properly.
1. THE COMPRESSED AIR METHOD
Not everyone is confident enough to use a screwdriver to disassemble their laptop. You can make use of a can of compressed air or try using a straw and blow air into it if you’re worried about making use of compressed air. Please never use a Vacuum cleaner. : They are quite ineffective at removing dust from laptops, and they can also cause a build-up of static electricity that you don’t want around a laptop.
The laptop must be turned off before you start. Next, the battery if you can. Insert the nozzle of the air compressor into the vents (or as close as you can get it) and start blowing the dustout. Ensure the fan blades stop turning. Make use of a long plastic object – you’ll have a hard time removing dirt from a spinning fan.
2. THE OPENING METHOD
The second method of cleaning your fan is by opening the laptop.
If you do not mind using a screwdriver, turn off your laptop, flip it over, and remove the battery, if you can.
Next, remove the plastic or metal panel in the base, and hopefully, it will reveal the fan. Please note that your laptop model will determine how you find the parts. If you can’t see the fan at all, you’ll have to go one step further and remove other components. Numerous YouTube videos show how to take laptops apart: just search for your make and model.
If you can access the fan, try to use a small brush to take out any dirt and dust you see. When you use compressed air, don’t get too close with the nozzle, and be sure to stop the blades moving. Afterward, unscrew the fan and check for any other dirt left underneath it. Any dirt leftover can block the heatsink or air vents.
After you’ve removed the dirt and dust, replace parts in the order, you eliminated them.
Related Post: How to keep your laptop from overheating
Reference: https://www.techadvisor.co.uk/how-to/laptop/how-clean-laptop-fan-3417484/


